Building Kitura Apps with Watson
Introduction
More and more developers are demanding the use of cognitive features in their applications. That’s why IBM Watson is targetting the need by providing many services through Bluemix that can be easily integrated into applications through a REST API. There are many services available on Watson, and they can be divided into major categories such as “language”, “speech”, “vision”, and “data insights”. Some very popular services include Natural Language Understanding for recognizing the meaning behind natural language and Visual Recognition for classifying contents in images.
Because interfacing with REST endpoint using low-level networking calls quickly becomes inefficient, there are many Watson Developer Cloud SDK’s that have been created to simplify making requests, exposing natural functions and data structures for the language. What would have taken over 500 lines of code, takes now 10. The Watson Swift SDK, previously named the iOS SDK, is now the second most used Watson SDK (after the NodeJS SDK). It had its origins, obviously, for the iOS mobile use case, but since the Swift programming language now can be used for running Linux, it has opened the SDK for usage for server-side programming as well. Now you can use the same SDK you have bundled in your client application, and easily move that functionality out to the server, giving you more control over the frequency at which calls to Watson are made, have a single point for credentials for making the calls, and also can create applications where the result of the request to Watson can be shared with multiple users.
In this tutorial, I will guide you how to take an existing chatroom, and add Watson Conversation to the room, so that the Watson bot can help the participants order sandwiches.
Cognitive Chatroom: Sandwich shop
Creating a dialog
-
Create a new Watson Conversation service in Bluemix
You will need to sign up for a Bluemix account if you don’t have one already.
-
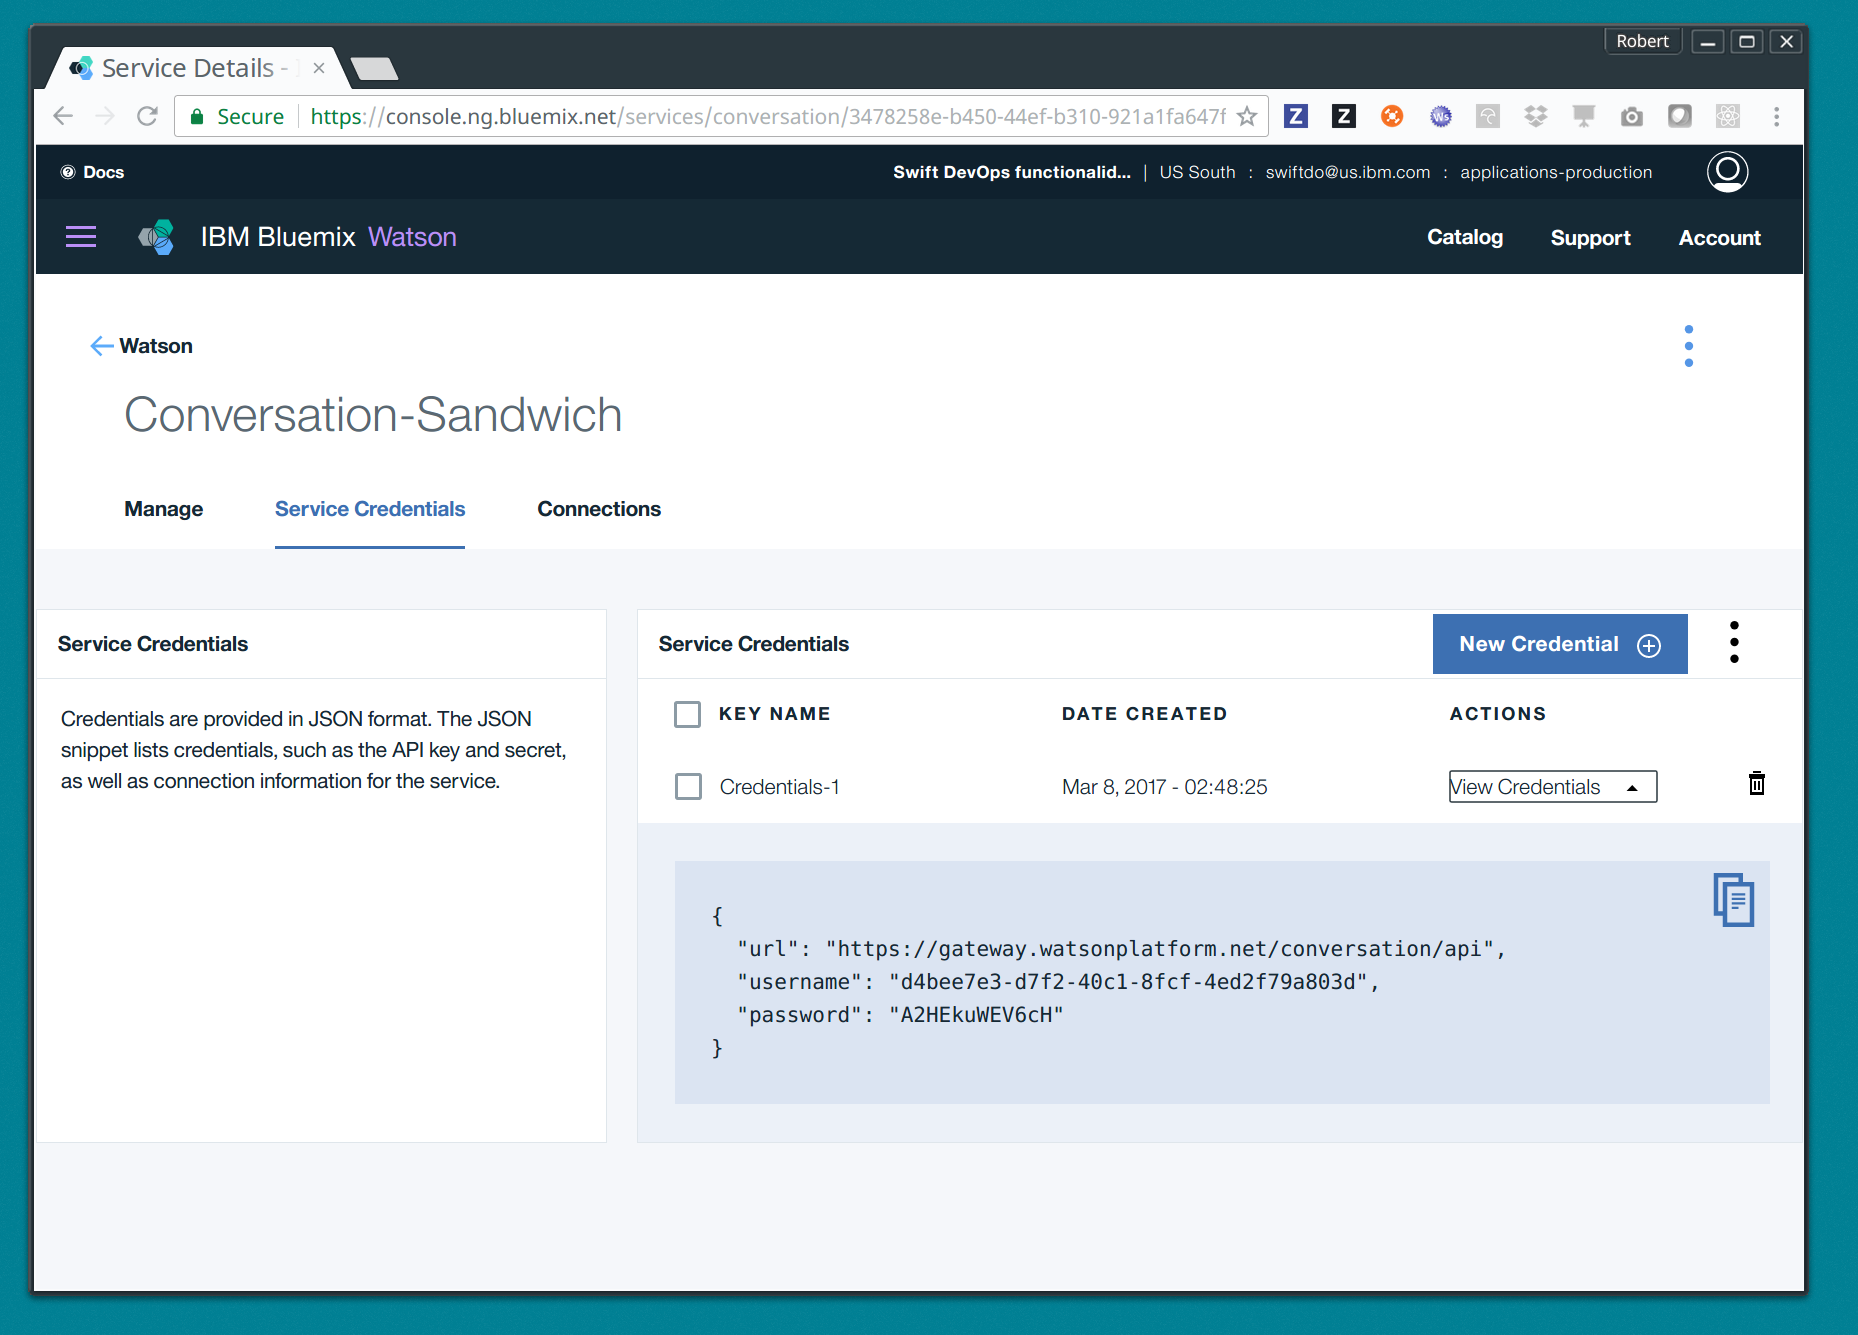
Get the credentials from the service and record it somewhere
After your conversation service has been created, you will be able to get the username and password for the service. Record these now, you will need it later when we start coding your application.
-
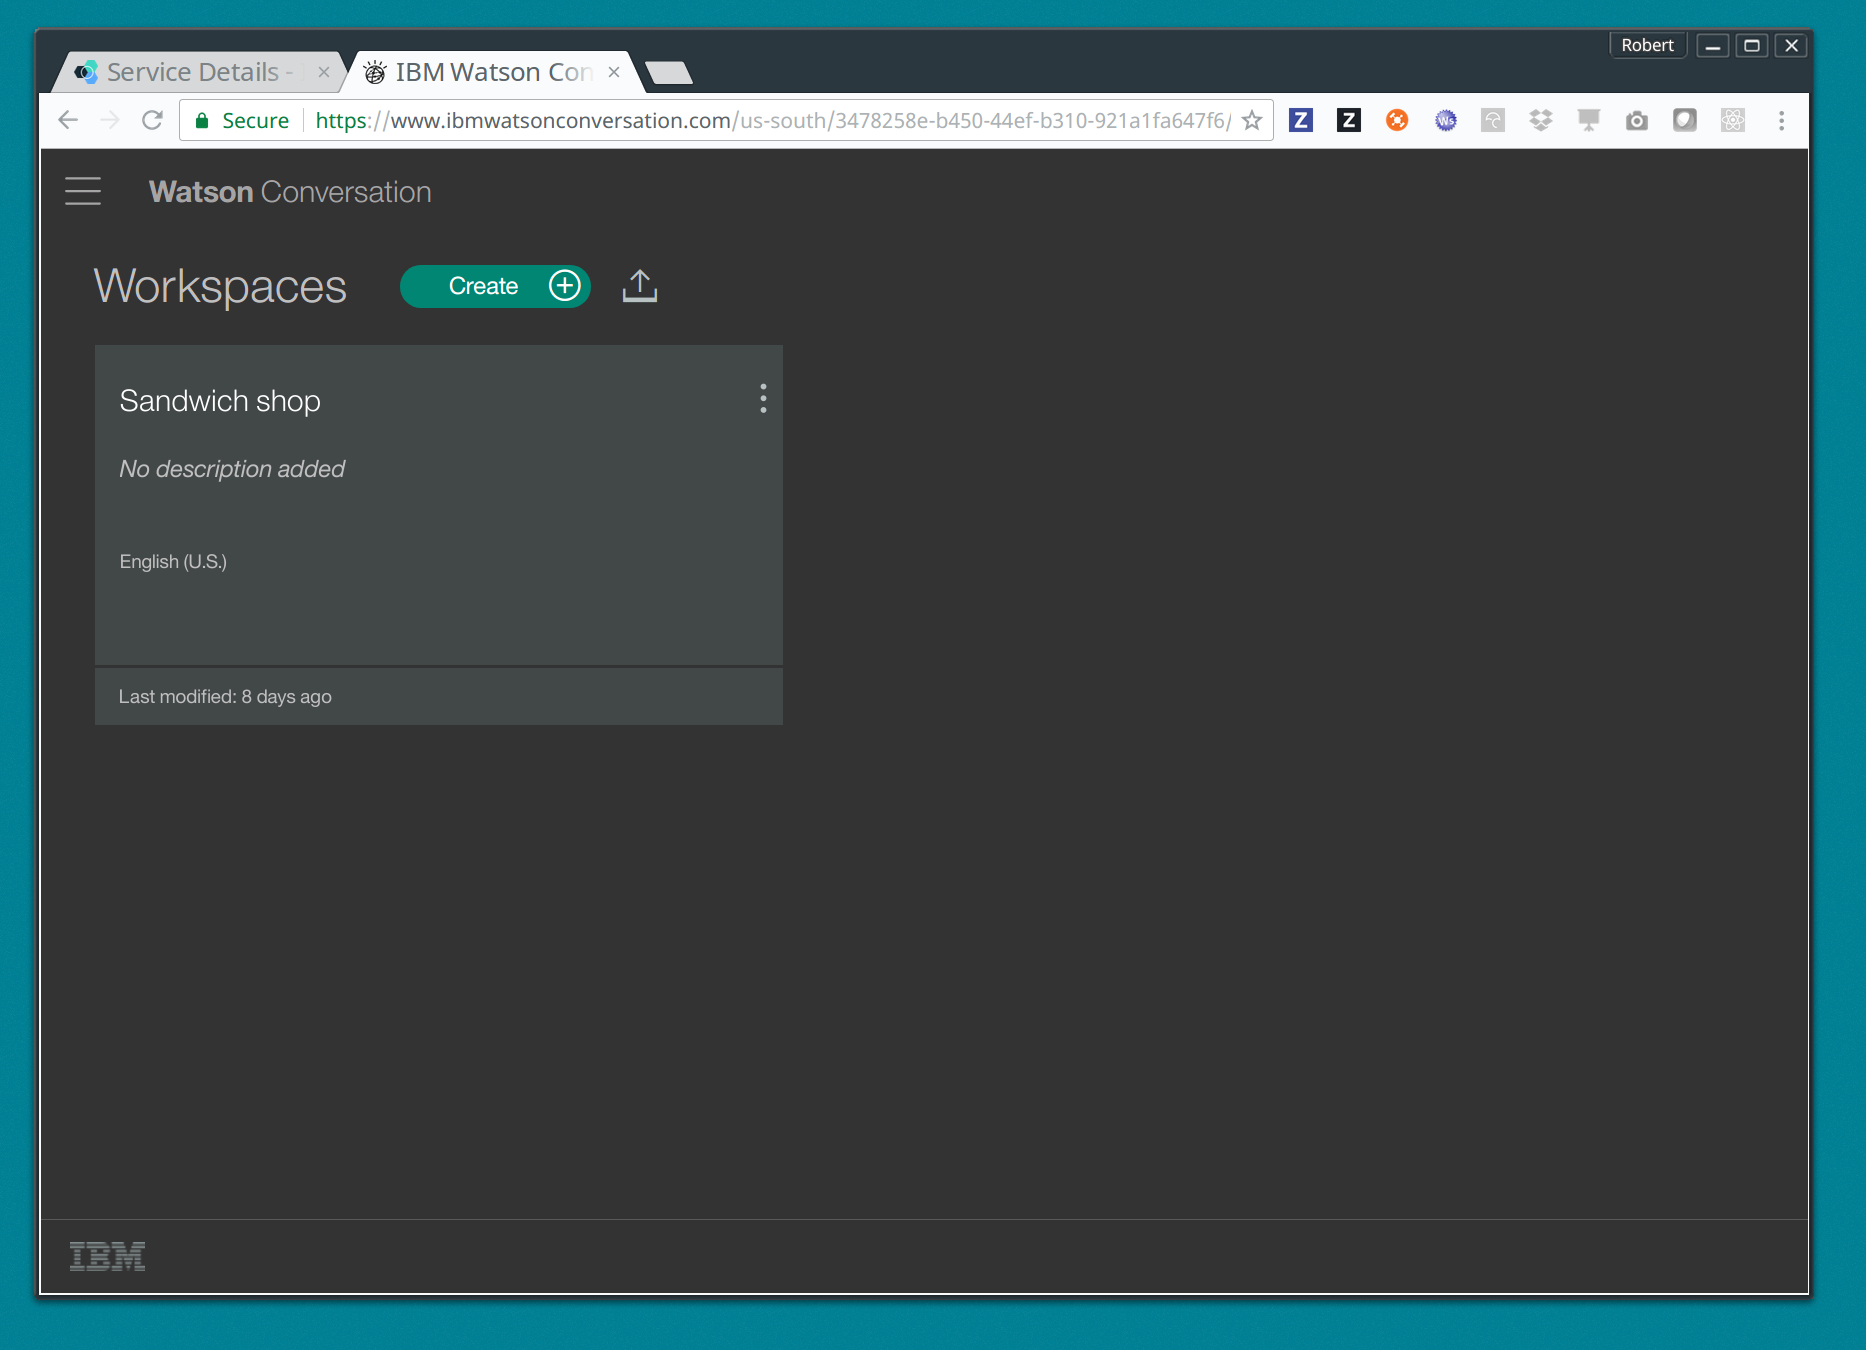
Create a new Workspace for your application
A workspace is the way you can express a dialog. Your Watson Conversation service may contain many workspaces for all of your user flows.
-
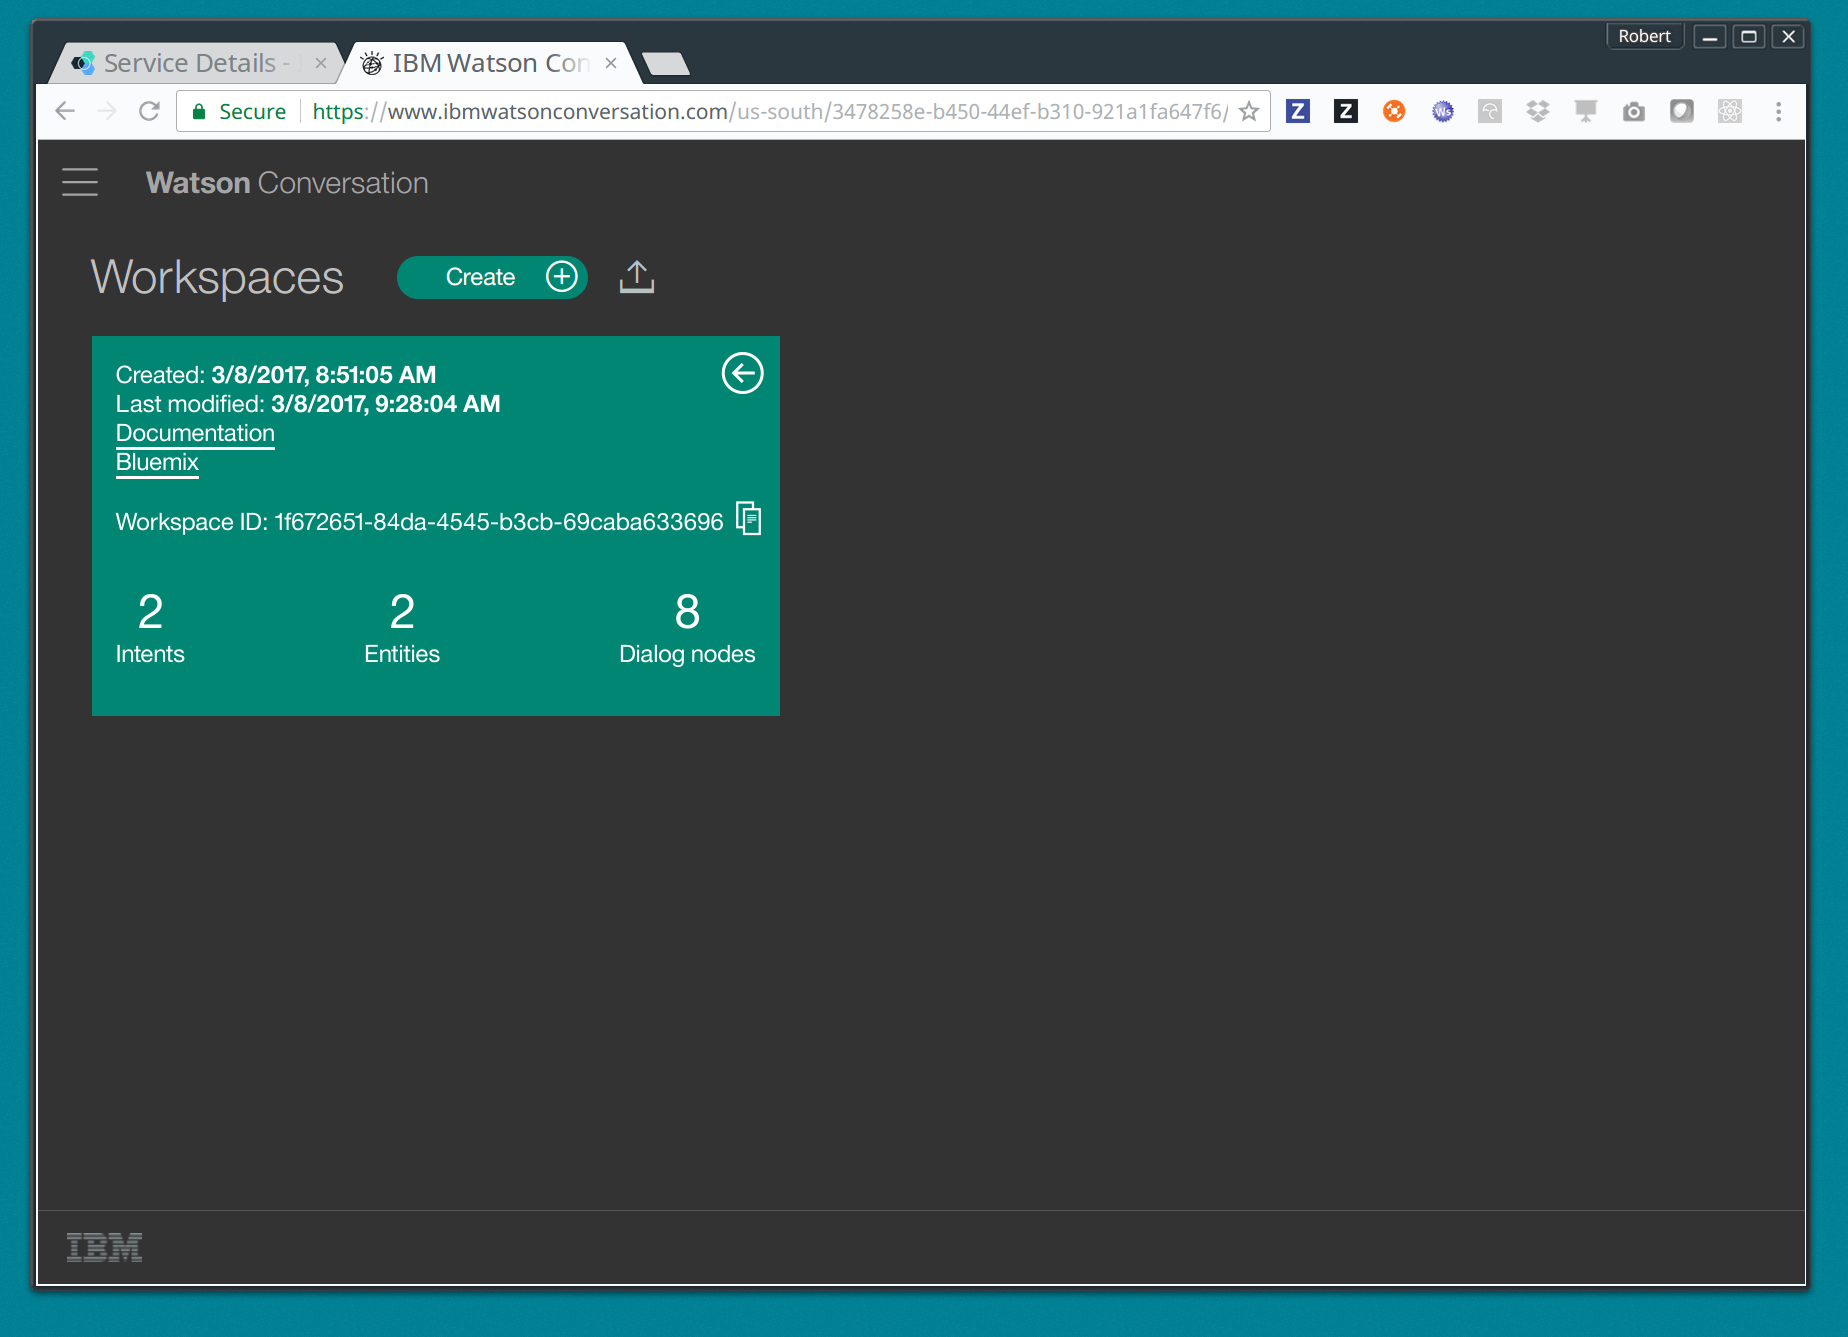
Get the workspace ID
You can select the “drawer” icon next to the workspace card and choose “edit” in order to see your workspace ID. You will need this ID later when you connect your code to this workspace.
-
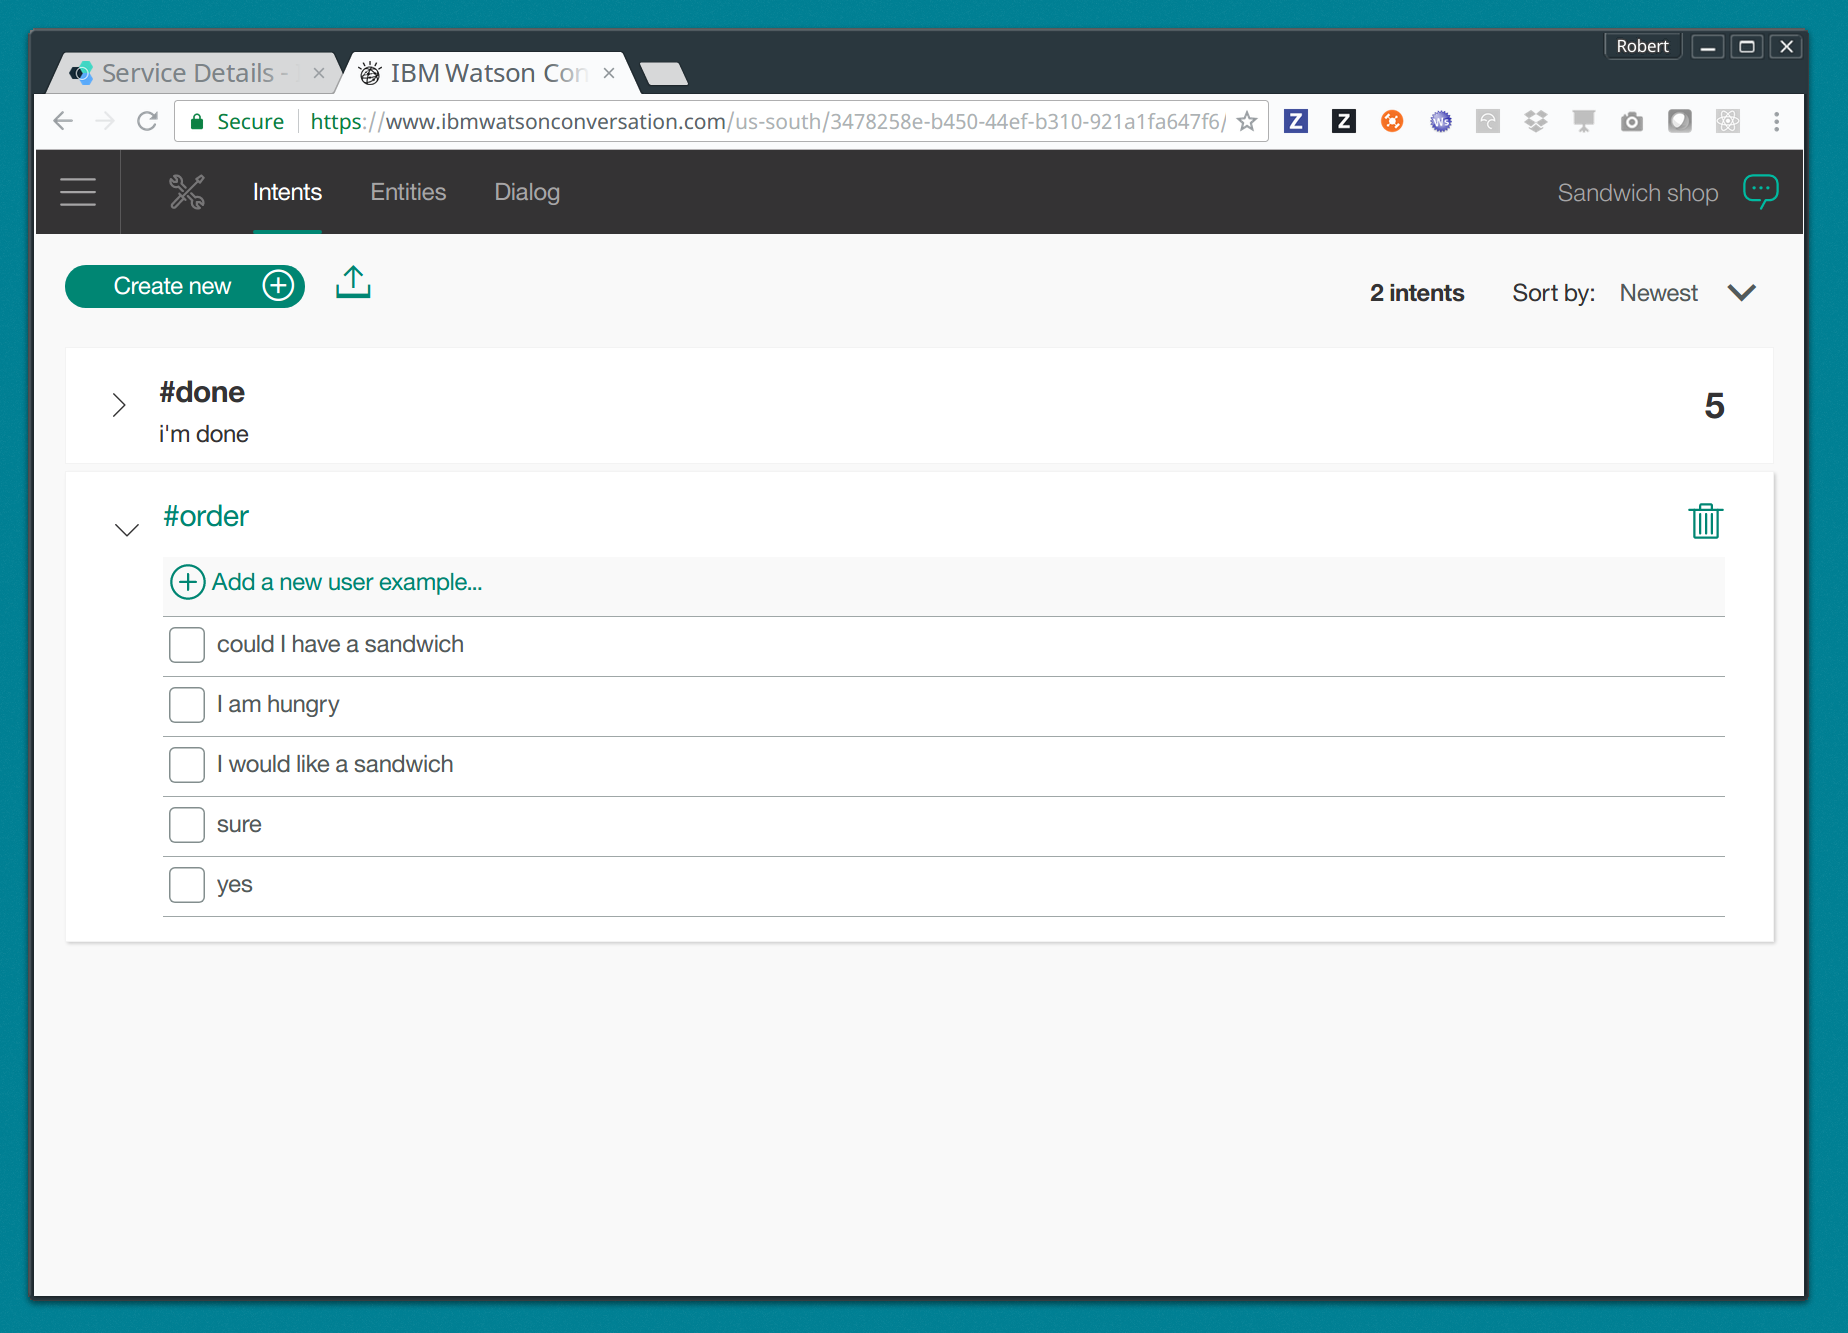
Create intents
Intents are the ways Watson understands your users’ intent. In other words, you can train the Watson Natural Language classifier with a bunch of examples of ways of expressing an intent like “ordering a sandwich”, and in the future, even though your users won’t necessarily write their requests exactly how you specified it, through training the language model Watson will select the intent if that request matched it within a certain threshold level.
So for our example, you can add a new intent called “#order” and the values can be:
-
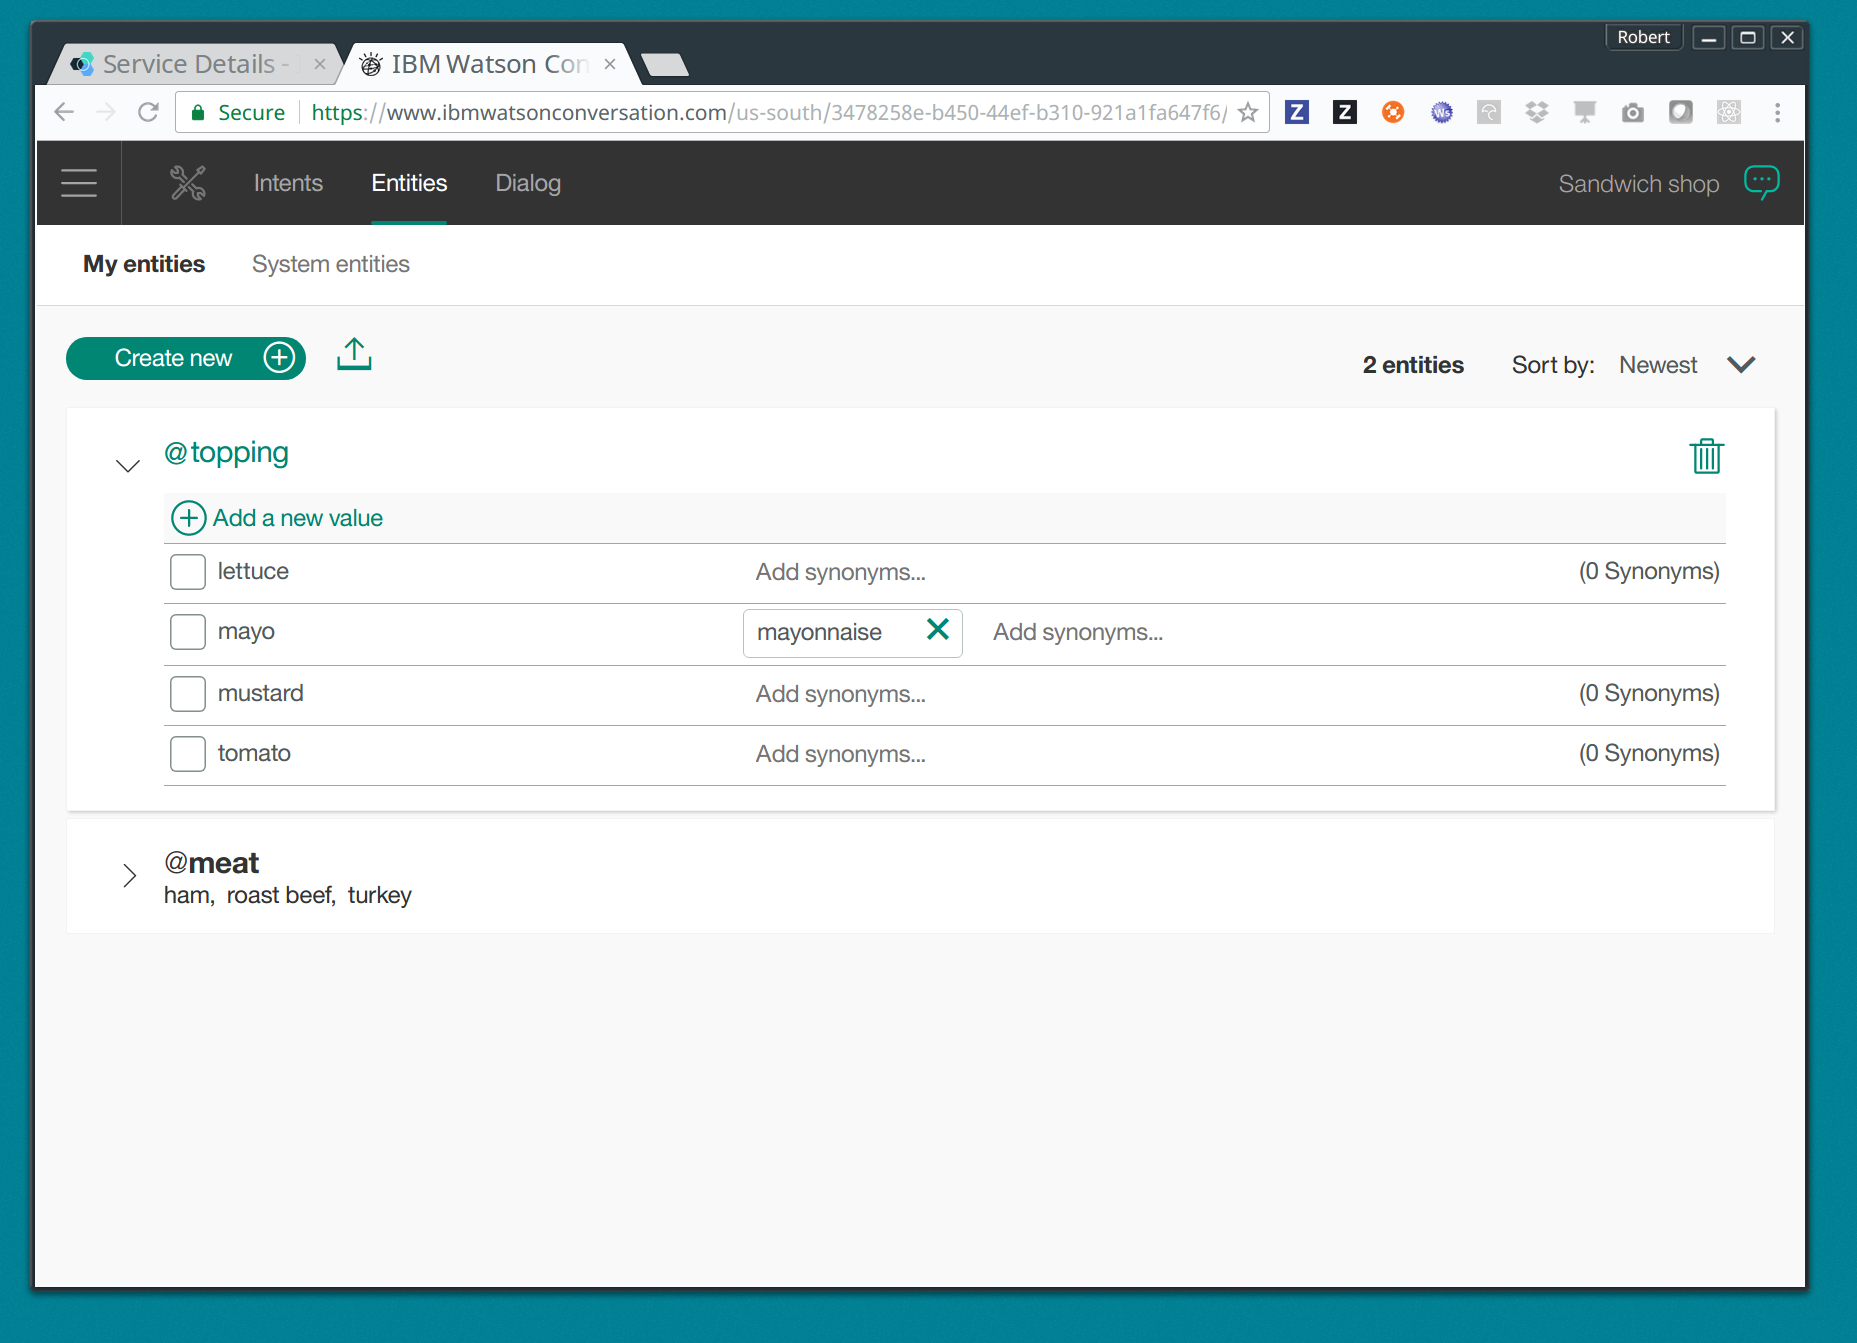
Create entities
Entities are the specifics of information that can come in through the intents. Entities are most likely nouns that help you better service the request. For our example, we will be creating some entity types like, @toppings and @meats.
Try adding some @toppings now:
-
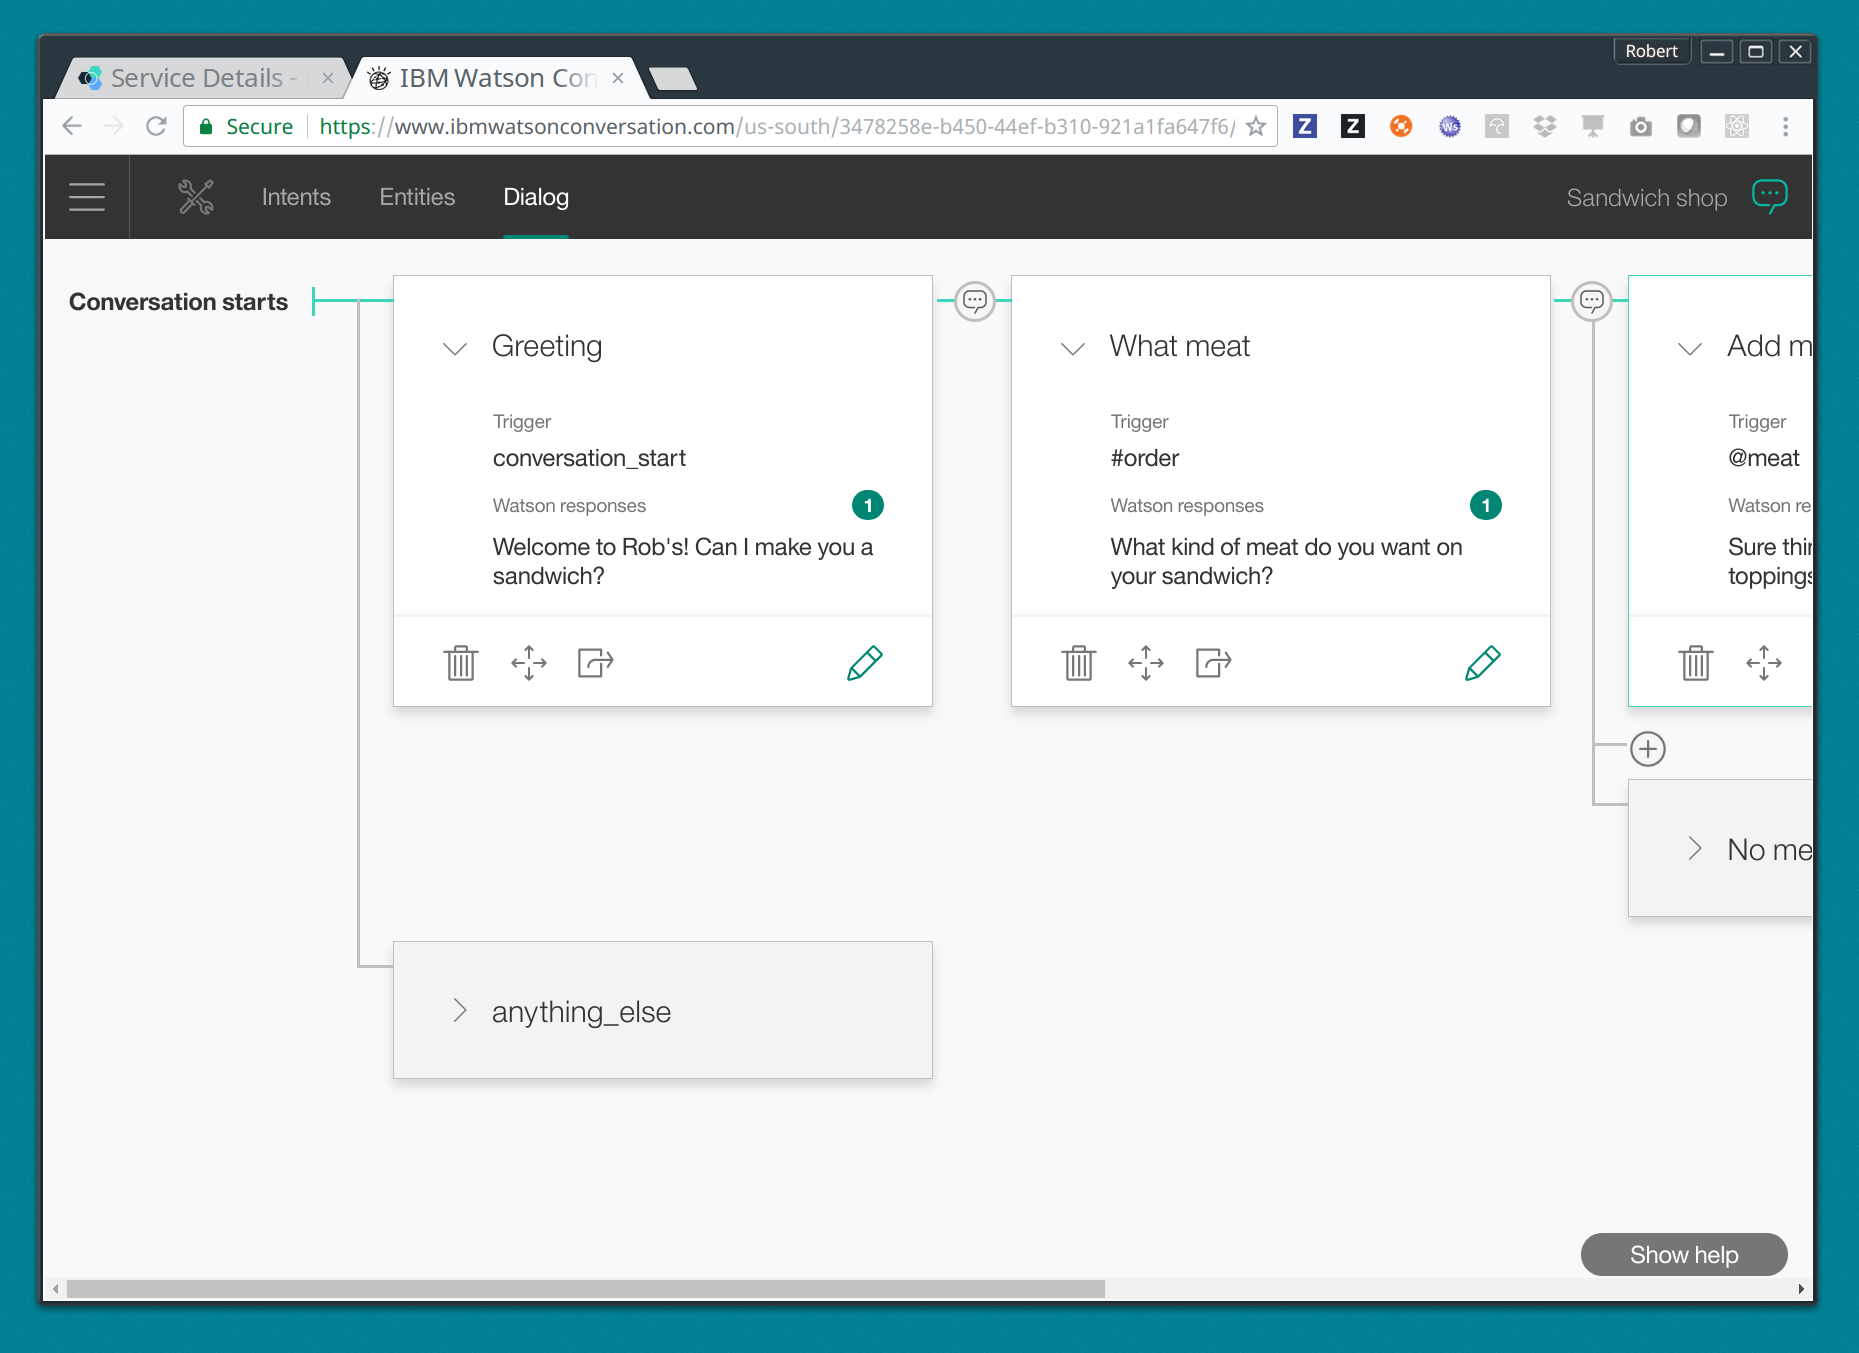
Design the dialog
You can now design your dialog with the intents and entities you created earlier. Your must create triggers that based on whether it is matched or not, will yield a response from Watson.

-
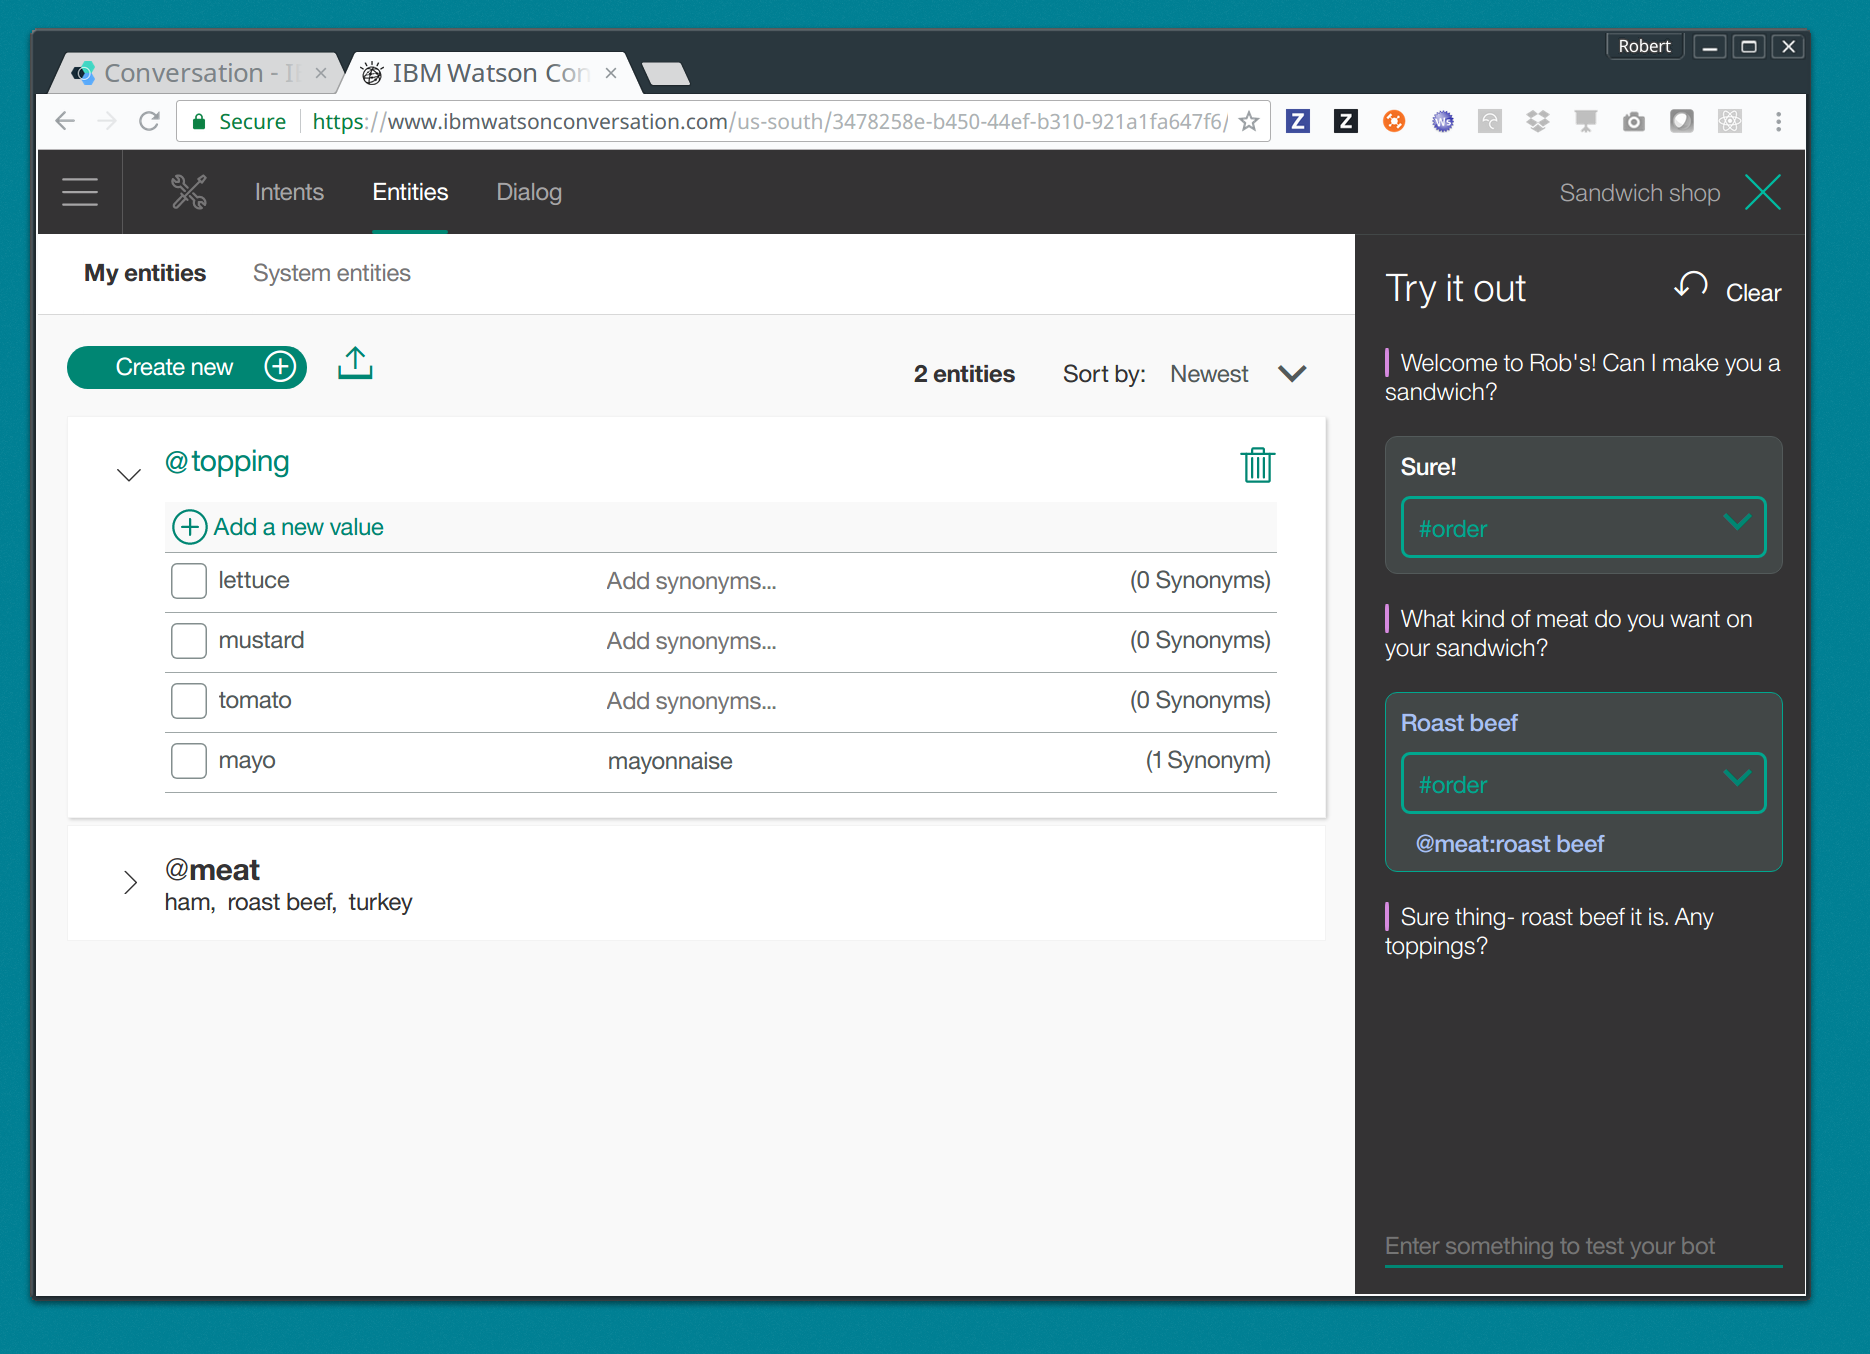
Test your conversation
It’s probably a good idea at this point to test your conversation and make sure it’s working properly. You can press the dialog bubble icon on the top right to start a simulation of your conversation.
Programming your server
-
Clone the Kitura Chat Server
$ git clone https://github.com/IBM-Swift/Kitura-Chat-ServerKitura Chat Server is an example application that shows how to build websocket-enabled applications with Kitura. It contains a combination of browser-side JavaScript code and a Kitura server that has a websocket endpoint.
-
Add the Watson SDK as a dependency in your project
In your Package.swift file, add to the bottom of the list of dependencies the following library:
.Package(url: "https://github.com/watson-developer-cloud/swift-sdk", majorVersion: 0) -
In the Source/KituraChatServer/ChatService.swift, import the Conversation service modules:
import ConversationV1 -
Set some of the settings for your service:
let username = "username-goes-here" let password = "password-goes-here" let version = "2017-03-06" let workspaceID = "workspace-id-goes-here" -
Add a Conversation service object to your ChatService class:
let conversation = Conversation(username: username, password: password, version: version) -
Add a Context for the conversation
A context allows the conversation to hold state. For instance, when you are finished selecting the meat on your sandwich, Watson continues the conversation with asking about toppings. Since REST calls are stateless by nature, we can hold state by keeping a state ID that is updated whenever you get a new response back.
var context: Context? -
Set the context of the conversation on application start.
public init() { conversation.message(withWorkspace: workspaceID, failure: failure) { response in self.context = response.context } } -
When a user signs in, add Watson as already in the chatroom:
In order for the client to have Watson as an avatar on their chatroom, a message needs to be sent out to the client that makes it aware of a user ‘connected’ event. The message looks like this: “C:Watson” which means, Watson was connected.
public func connection(connection: WebSocketConnection) { self.lockConnectionsLock() connection.send(message: "\(MessageType.connected.rawValue):Watson") self.unlockConnectionsLock() } -
Add function to ask Watson a question:
 private func tellWatson(message: String) {
     let components = message.components(separatedBy: ":")

     guard components.count == 3 else {
         return
     }

     let question = components[2]

     let request = MessageRequest(text: question, context)
     conversation.message(withWorkspace: workspaceID,
                          request: request,
                          failure: failure) {
         response in

         if response.output.text.count > 0 {
             let text = response.output.text[0]
             self.lockConnectionsLock()
             for (_, (_, connection)) in self.connections {
             let message = "\(MessageType.sentMessage.rawValue):Watson:\(text)"
             connection.send(message: message)
             self.unlockConnectionsLock()
         }

         }
     }
 }
-
Add a call to ask Watson right before the echo is invoked:
+ tellWatson(message: message) echo(message: message) -
Compile your project with
$ swift run -
Run your server
$ .build/debug/KituraChatServer
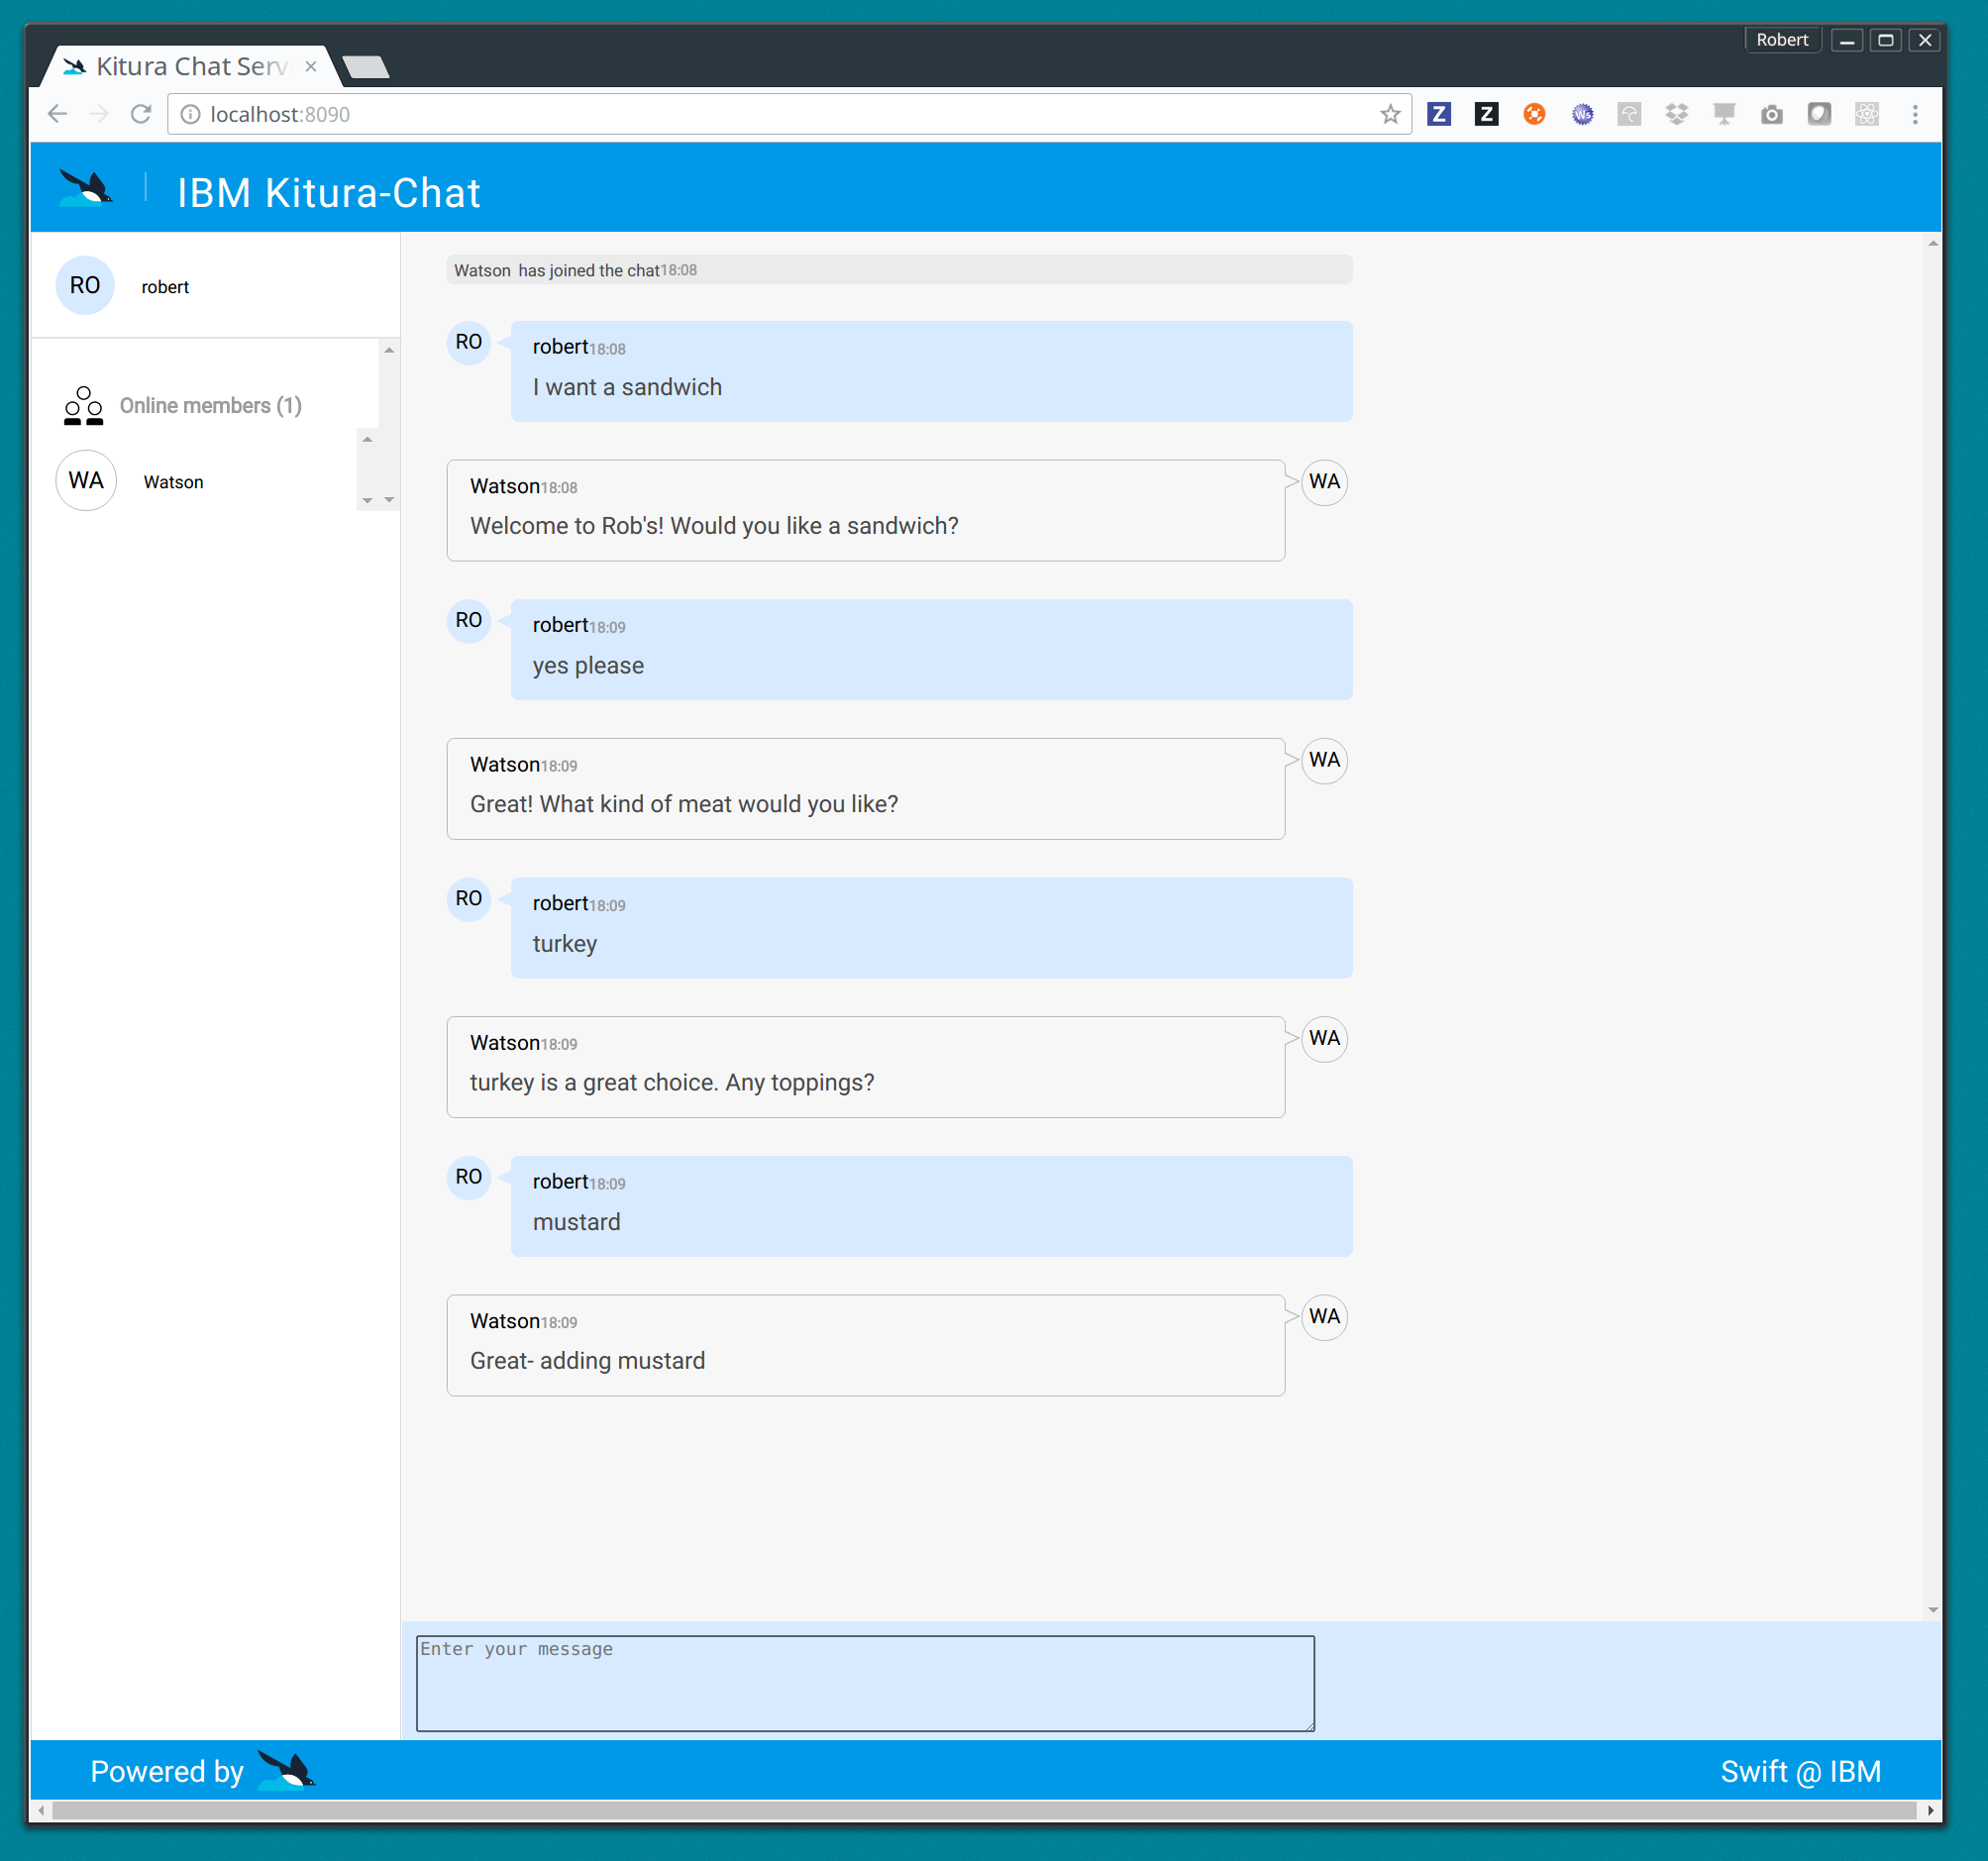
-
Open your browser at http://localhost:8090, and talk to Watson!
Conclusion
I hope you enjoyed this tutorial, and feel inspired to add the Watson services to your next Kitura application!
Some future directions you can go with this tutorial is:
-
Make the Context specific to a particular user instead of a shared Context across all users in the chatroom.
-
Extract the entities that were selected from the response and use it to actually persist the sandwich order.